Showing posts with label Recipe. Show all posts

Tuesday, August 13, 2013

Recipe: Carrot Cake


As-Salam,

Carrot cake does sound yummy and to those who just loves it may want to devour it event more. On the 4th day of Syawal, we had an open house for the family members. So, the night before I decided to make carrot cake for the guest. First time making the cake and its kinda nerve wrecking. Then after 30 minutes in the oven, the cake turns out nicely and I think the cake may needs a thing or two of alterations. The end taste of the cinnamon was quite. I did not use walnut in this recipe thus the cake was really chewy by the presence of dessicated coconut. It would taste even more better if there's some crunchiness from the walnut. Here are the ingredients of the recipe that have been altered. The original recipe was taken from the Kitchen Guardian. Click here for the recipe.


Carrot Cake Recipe
Ingredients
1 cup Canola Oil
4 large Eggs
1 tsp Vanilla Essence
1 ½ cups sugar
2 cups All-purpose Flour
2 tsp Baking Powder
2 tsp Baking Soda
1 tsp Ground Cinnamon
½ tsp Salt
3 cups Grated Carrots (about 2 large carrots)
1 cup Coarsely Chopped Roasted Walnuts or Pecans
1 cup Dessicated Coconut (unsweetened)
½ cup Raisins

Method
1. Preheat oven at 170°C.
2. Prepare 2, 8 inches cake tins.
3. Grate carrots and chopped the walnuts/pecan.
4. Sift together flours and cinnamon, baking soda, baking powder and salt.
5. Beat oil, sugar, vanilla and eggs together with a mixer until twice the volume.
6. Add flour mix, following with carrots and walnuts. Divide the cake batter equally in the cake tins. Bake
    about 30 minutes and test with tooth pick until they comes out clean.
7. Let the cakes cool and cover the cake with Cream Cheese Frosting.


Less Sweet Cream Cheese Frosting
250g Cream Cheese
1 tsp Lemon Juice
1 tsp Vanilla Essence
½ cup Powdered Sugar

Beat the cream cheese with vanilla and lemon juice until soft. And beat in sugar until well corporated. You can add more sugar if it wasn't sweet enough for your tooth :) 

The half way eaten cake! 
          Then, after baking the carrot cake, there were some white eggs left overs from the chocolate chips cookies. Decided at that night to make some not so mini pavlova. One day I would really love to try to make cute pavlova with the size of a cupcake that will suites for any events.  I would really like some green kiwi but unfortunately, I've taken the wrong box of kiwi and it turns out to be yellow kiwi. Yellow kiwi was sweeter compared to the green one.

Pavlovas with yellow kiwis, black grapes and strawberries

Monday, August 5, 2013

Recipe: Biskut Cornflakes Madu


As Salam,

Selang beberapa hari lagi tiba bulan Syawal. Bagaimana dengan persiapan raya korang tahun ini? Mestilah meriahkan. Memang sudah lama tidak update blog. Memang sibuk sikit sejak kebelakangan ini. Maklumlah, dengan persiapan wedding dan tidak lupa juga projek product development di office. Buat produk masa bulan puasa memang mencabar sebab tak boleh rasa sedap atau tidak makanan yang disediakan.

          Tahun ini, ade juga cuba-cuba buat kuih baru untuk lebaran. Ialah, setiap tahun pun biskut chocolate chips, maka tahun ini bertambah biskut yang ada, contohnya biskut sarang semut, biskut cranberry oat dan biskut cornflakes madu. Semua biskut ini memang firstime buat dan biskut cornflakes madu was a special request from fiancĂ©e.

          Resepi di ambil daripada internet. Saya rasa butter daripada resepi asal perlu dikurangkan daripada 250g kepada 200g mesti lagi sedap rasanya. Saya gunakan Nestle Cornflakes sebab tebal sikit berbanding Kellogs atau yang dijual di kedai bakeri. Moh kite tengok resepinya.


Resepi Biskut Cornflakes Madu
Bahan-bahan:
200g Buttercup
I kotak besar Nestle Cornflakes
1 ½ cup Madu
1 cup Gula Castor

Cara-cara:
1)      Cairkan butter dan madu di dalam kuali dengan api yang perlahan
2)     Setelah cair, masukkan gula dan kacau hingga cair
3)     Semasa masih panas, tuang campuran madu di dalam cornflakes (dalam mangkuk besi / tahan suhu panas) dan kacau sehingga madu menyaluti semua cornflakes.
4)     Masukkan cornflakes bersalut di dalam paper cup
5)     Untuk lebih rangup, bakar cornflakes madu pada suhu 130°C selama 7-10 minit.

Tuesday, May 14, 2013

Recipe: Apricot Cheesecake


Salam,

It has been a long time I didn't post anything referring to any new recipe. Honestly I am being too lazy to cook something rice. Since gaining few kilos of fats, I am totally need to balanced up my diet and that is why the therm of cooking laziness took place. Because of the stamped of expiry date on the food label horrors me bit and some fast action needed to prevent any food wastage. At the time I have cream cheese, biscuits and dry apricots to work with. Yes, I think of cheesecake is the best way! Yums~

A slice of apricot cheesecake
          Pardon me people. This is my first attempt of making apricot cheesecake. It looks nice but it does not taste as sweet as it looks. For someone with sweet tooth, I recommend to glaze the cake with more or just sweetened the glaze a little more. Enjoy the recipe and I am grateful if you have any comments to improve this recipe. Thank you in advance.

Ingredients

Sauce
100g Dried Apricots
3 Spoonful Apricot Jam
2 Spoonful Castor Sugar
1/2 Cup Water


Cake Base
10 pieces Finely crushed 
Digestive Biscuits
100g Melted butter

  
Cheese Fillings
300g Cream cheese
130 ml Yogurt
2 Eggs
100g Castor Sugar
1 tbsp Vanilla Essence
1 tbsp Corn Flour

Methods


Simmer all the ingredients until the dried apricots absorb the liquid and the sauce is thickened.


Preheat oven 180°C.
Mix in together the crushed biscuits with melted butter.
Press mixture evenly onto bottom of a 7-inch spring form pan. Bake for 10 minutes or until golden brown. Set aside.


In a large mixing bowl beat cream cheese, sugar, yogurt, corn flour and vanilla until combined. Add eggs all at once, beating until just combined. Stir in chopped apricots from the sauce. Pour filling into the crust-lined pan. Place on a water-bath and bake about 45 minutes or until the centre appears nearly set when pan is gently shaken (it will continue cooking after you remove it from the oven). Cool in the pan on a wire rack for 15 minutes. Loosen crust from sides of the pan and cool another 30 minutes. Remove the sides of the pan and cook the cheesecake completely.  Glaze the cake with the apricot sauce. Ready for serving.

Using D'arbo jam for the sauce and whole cup (130ml) of Marigold low fat yogurt


This is the 7 inch cake looks like

Friday, January 18, 2013

Recipe: Banana Cake

Hello everybody! I baked a very heavy banana cake for 1.5kg last week. This is my second time baking it and I like to share the recipe with you. When mixing the ingredients, actually I forgot to put in the baking soda, but Alhamdulillah because I'm using self-raising flour, the cake turn out just nice! Actually, at the moment I start to realize that I forgot about it, I almost cried! There are various types of banana (or pisang) can be purchased at the market. For examples we have Pisang Berangan, Pisang Tanduk, Pisang Emas, Pisang Awak, Pisang Montel etc. For me the best banana to make a cake is Pisang Emas because the ripe banana has a sweet taste and very fragrant when baked.

To have a zing to your banana cake, you can add some nuts according to your taste buds and I prefer to add walnut to my cake. It creates a different texture. Put the nuts into the cake and also deco the cake with nuts on top. This time, I also deco the cake with some dried apricots!

I baked this into 9 inch baking pan - notes, if you put in baking soda, you may need larger container or divide the cake batter into two for safety.


Banana Cake Recipe

Ingredients
1 1/2 cup mashed banana
2 tbs lemon juice
375g self raising flour
1 1/2 tsp baking soda
1/4 tsp salt
170g butter
200g castor sugar
200g brown sugar
3 large eggs
2 tbs vanilla essence
354ml buttermilk
1 cup Walnuts (or any nuts will do)

Methods
  1. Preheat the oven at 180˚C (you can go as lower as 150˚C)
  2. In a bowl shift together flour, salt and baking soda. Set aside.
  3. In another bowl mix mashed banana with lemon juice and set aside.
  4. In mixer bowl, blend together butter, castor and brown sugar until pale and fluffy.
  5. Add in the vanilla essence and the eggs one at a time. Mix the batter well.
  6. Alternately add in flour and buttermilk. Mix it together and finally add the chopped walnuts (make sure that you bake the nuts a little bit before adding into the batter).
  7. Bake the batter into 2 x 8 inch spring form baking pan for 30-45 minutes.

Thursday, December 27, 2012

Recipe: Making Pavlova!


Alhamdulillah, we meet again. It has been a while I didn't write a thing or two for the blog. Yup, been super busy with the cookies and some madness situation that I have to handle patiently. The cookies business have been a great deal lately and for that I am so blessed and thankful for the sustenance. Syukur!

           From making the cookies, there are lots of egg whites leftovers. After watching the Second Season of Masterchef  Malaysia, I am so keen to make myself a beautiful and puffy pavlova! It looks simple to make and yes people, it is so simple to make it. On the first trial, I gained the recipe from the net and the taste, masyaAllah! Super sweet and seriously I cannot eat them. Luckily I have my office colleague to finished them off. Actually I made the first pavlova especially for Maisarah birthday! Sorry Mai, it was too sweet to consume and happy belated birthday!

          This second trial came out perfect with some alteration to the previous recipe. A major alteration of course! Less sweet and the fruits was so tempting! These are the recipe and may you enjoy baking it.


PAVLOVA RECIPE

Ingredients
150g egg whites
150g castor sugar
1 teaspoon lemon juice
1 teaspoon vanilla essence
2 teaspoons of corn flour.
125ml non dairy whipped cream
75ml milk or any liquid will do
2 tablespoons of powdered sugar.
Fresh fruits.
Methods
  1. Pre-heat oven to 170˚C. Line a baking sheet with parchment paper. Draw a 8 inch circle on the parchment paper.
  2. In a large bowl, beat egg whites, vanilla, sugar, corn flour and lemon juice until stiff but not dry. Beat until thick and glossy. Do not over beat. Be absolutely sure not a particle of grease or egg yolk gets into.
  3. Spoon mixture inside the circle drawn on the parchment paper. Working from the center, spread mixture toward the outside edge, building edge slightly. 
  4. Put your meringue into the oven and decrease the temperature to 100-120˚C. Bake for 1 hour and let the meringue rest a little bit in the oven (open the door a little bit). Cool on a wire rack.
  5. In a small bowl beat cream, milk and powdered sugar until stiff peaks form; set aside. Remove the parchment paper, and place meringue on a flat serving plate. Fill the center of the meringue with whipped cream. Top whipped cream with fresh fruits as what  you desires ( I recommend sweet sour fruits such as berries, mango, kiwi, passion fruits to balance the sweetness of the meringue).

Pardon my falling apricot :)


Wednesday, September 26, 2012

Recipe: Tira Miss U (Tiramisu)

First attempt to make this yummy-licoius Tiramissu as per requested by my fiancee. But I didn't make it for him yet. This is for Kak Izan last birthday small celebration at the Lab. At first, I thought it was difficult to make tiramisu. But say no more! It was so easy even if the person who don't know how to cook can do it! No need an oven for baking, only a fridge will do! In my point of view, mascarpone cheese was seriously damn expensive. It is about RM18.00 per pack (if I'm not mistaken by the figure). So, decided to use only cream cheese and further more it was easy to find it here. Okey, let us view the recipe!


   Tiramisu Recipe
 Ingredients
  • 3 eggs (seperated)
  • 100g castor sugar
  • 350g cream cheese
  • 300g Rich Whip Topping Base (Non-Dairy)
  • 10g gelatin - Dissolve the gelatin in 40ml  or 2tbsp+2tsp of hot water.
  • 1tbsp Vanilla Essence
  • 2tbsp Instant Coffee
  • 1tbsp Sugar
  • 1 cup of boiling water
  • Ladyfingers
  • Coco power
 Methods
A
Beat cream cheese and powdered sugar in large bowl with electric mixer on medium speed until smooth. Beat in the egg yolks and vanilla until fluffy; set aside. 
B
Beat egg whites in another bowl until stiff peak form. Set aside 
C
Beat whipping cream in a large bowl on high speed until stiff peaks form. Fold in the gelatin bit by bit. 
D
Fold in the whipping cream into the cream cheese mixture until mixed. Then fold in the egg whites in to the mixture and mixed until the cream is well combined. 
E
Dissolve the instant coffee and sugar in the hot water. Arrange the ladyfingers on the bottom of the square or round pan. Drizzle the coffee over ladyfingers. Spread the cream cheese mixture over ladyfingers. 
F
Sift or sprinkle cocoa over top. Cover and refrigerate about 4 hours or until filling is firm. Store covered in refrigerator.

    Thursday, August 2, 2012

    Recipe: Popia Goreng


    For almost a week now that I am so craving to eat Fried Popia. But, I don't want to just buy them from the Ramadhan Bazaar. You know how they sometimes taste awful  and regret from buying them after that. You are considered yourself lucky if you find a really good Fried Popia and lest not forget the cheap one.

              I remember on the second day of Ramadhan I managed to get some of the food at the Wangsa Maju Ramadhan Bazaar near to the LRT station. I saw Popia Basah there and asked the seller, "Abang, ni berape harganya?". He answer, "Dua ringgit 4 biji dik." With the look on my face and of course some chit chat with myself, "Popia kecik kurus camni dua ringgit dapat 4? Mahal kot."...But I said to the seller, "Okey la bang, kasik dua ringgit". Hahaha, I still bought them although it was thin enough. Kempunan punya pasal. The moral is, Fried Popia or Popia Basah at the Night Market on Wednesday near my house was still the best so far! Fat, spicy and the happy thing was you can get 5 popia for RM2.00.

            This is what had happen yesterday. I made my own popia! Happy! Furthermore I was exited to shared the recipe too because it was so easy to make. Managed to do this after I arrived from the working place all away from Serdang (Imagine the jams!Penat!). Alhamdulillah, this is our Juadah berbuka puasa for yesterday.


    FRIED POPIA RECIPE 

    Ingredients:
        1 Cloves of Garlic / Bawang Putih
        2 Shallots / Bawang Merah
        1 Carrot
        1/4 Jicama / Sengkuang
        1 Egg
        150g Minced Meat
        Salt and Pepper
        Popia's pastry

    Methods: 
        1. Fried garlic and shallots with a little bit of oil
        2. Add in the meat. Fry the meat until cooked and put in together all the vegetables.
        3. Put in some pepper and salt for the taste.
        4. Lastly break the egg in the middle of the frying pan and stir it.
        5. Fry this filling until dry.
        6. Let the filling cool a little bit.
        7. Now you can rolled the filling with the popoia's pastry.


    The popia's filling

    You see I managed to roll them...but I think it is not that pretty though.


    Monday, July 2, 2012

    Pekan Rabu and Ikan Pekasam


    Last week I was in Alor Star, Kedah. Of course it a working trip. But I managed to go to Pekan Rabu literally know as Wednesday Market at the heart of Alor Star. It is an old market and has been standing there for 37 years. Older than I am! My main goal is to buy Ikan Pekasam...Yummy! My favorite although it has some ewww fermentation smell. Ikan pekasam is fish fermented with lots of salt, rice and tamarind for few weeks (normally for 2 weeks).

    Kak Izan berposing =)
    Fermented fish known as "Ikan Pekasam"

    Recipe - Ikan Pekasam Goreng


    Ingredients: 
      2 Ikan Pekasam
      1 Onion
      3 Dried Chillies
    Methods:
    1. Cut onion and dried chilies.
    2. Heat the oil and fried the 'Ikan pekasam' until cooked / crispy.
    3. Sere a little bit the onion and chilies with a spoonful of oil form frying the fish.
    4. Sprinkle the fried onion and chilies over the fried fish. Done =) 

    Friday, June 22, 2012

    Happy Birthday Kak Yati!


    On 22.06.2012, I like to wish Happy Birthday to Nor Haryati Ali a.k.a Kak Ti. May Allah bless you always! Always happy and will be loved by others around you.


              Specially for her, I bake a new cake that I have modified and Alhamdulillah They said it taste great! Not too sweet as for my previous recipes. I am glad that she love the cake.Phew~ I know her favorite color was pink, and I made a Custard Layered Cake with bits of Chocolate Chips. Looks very delicious!

    Birthday girl cutting the cake :)
              So, this time I like to share with you guys the recipe. It was simple and surely you can do it too. The important tip for this recipe is to layer the cake white the custard is still hot. Before pouring the custard, grease your 8 inch spring form pan with butter so that the cake will came out easily and will not stick to the pan. To ensure the is no bubble trapped in the custard, you have to press the cake a little bit to the custard. Good luck!

    Pink Vanilla Layered Sponge Cake


     Sponge Cake
       Ingredients

         125g Cake Flour
         1tsp Baking Powder
         160g Castor Sugar
         5 Large Eggs (A Grade)
         75g Vegetable Oil (I used corn oil)
         1tsp Ovalette
         1tsp Vanilla Essence
         2tbs Fresh / Evaporated Milk
         Red colorant

       Methods
    1. Preheat oven at 180˚C.
    2. Sieve together flour and baking power in bowl and put aside.
    3. In a large bowl, mixed together all the ingredients except the flour. Beat the ingredients with electric mixer at high speed until the mixture increased and fluffy.
    4. Put in the flour to the mixture and mixed until the mixture combined.
    5. Divide the cake batter into three (~200g) and mix with colorant (you can choose any color you wanted for your cake). 
    6. Greased three of 8-inched spring form baking pan with butter and put in the batter.
    7. Bake for 15 minutes.
    Custard
      Ingredients

         800g / 2 cans Evaporated Milk
         250g Castor Sugar
         85g Instant Custard Flour
         250ml Water
        10g Instant Agar-agar Powder
        1tbs Vanilla Essence
        Dessicated Coconut
        Chocolate Chips

    Method
    1. Combine together all the ingredients in a pan 
    2. Cook the custard at medium heat and stir the mixture until thick. 
    3. Pour in the custard mixture in 8-inch spring form baking pan and layered with the sponge cake. 
    4. Refrigerate the layered cake in fridge for at least 2 hours (overnight would be better). Decorate the cake with desiccated coconut and ready to be served. 


    Tuesday, May 29, 2012

    Recipe: Lebanese Flat Bread


    Yesterday, I went to one of mini shops at Serdang just to look around and found Lebanese flat bread on the shop's rack called Roti Sihat. I bought it and of course it wasn't as fresh as when you dine in some Arabic restaurant. But I like the chewy texture. From the packet, it is recommended to serve the bread as a pizza base, substitute to pita bread or dip the bread with any gravy including humus or baba ghanoush (I miss Samaneh's baba ghanoush - SEDAP!). The most important is, from the bread tag line - Roti Sihat. The ingredient and the recipe that I have found really proves it is healthy. Less sugar, less fat, less salt! Below is the recipe found on the net. Looking forward to test it!

    Make this delicious, exotic accompaniment a part of your Springtime barbecue feast.  
    Ingredients
    (Makes: 8 bread)
    7g sachet dry yeast
    1 teaspoon caster sugar
    1 1/3 cups warm water
    4 cups plain flour
    1 teaspoon table salt
    2 tablespoons olive oil
    Method
    1. Place yeast, sugar and 1/3 cup warm water in a jug. Stir to dissolve yeast. Set aside in a warm place for 10 minutes or until foamy.
    2. Sift flour into a large bowl. Add salt. Stir to combine. Make a well in centre. Add yeast mixture, 1 tablespoon oil and remaining warm water. Mix to form a dough.
    3. Turn dough out onto a lightly floured surface. Knead, adding remaining oil, for 20 minutes or until smooth. Place dough in an oiled bowl. Cover. Set aside in a warm place for 2 hours or until doubled in size.
    4. Using your fist, punch dough down. Knead for 2 minutes or until smooth. Divide into 8 balls. Using a rolling pin, roll each ball out to a 22cm round. Layer rounds between baking paper. Set aside in a warm place for 30 minutes or until slightly puffed.
    5. Heat an oiled barbecue plate on high (230˚C). Reduce heat to low. Cook bread, in batches, for 2 minutes each side or until lightly browned and puffed. Serve.

    Saturday, April 21, 2012

    Recipe: Pandan Layered Cake


    Today I am so excited to bake and decided to bake Pandan Layered Cake. Yes I have done this cake before and for me the cake wasn’t sweet. Actually I like sweet cakes and if you are not a sweet tooth person, you will definitely love this cake! While counting the eggs, I found that I only have only small eggs. But never mind, instead of putting 5 large or A size eggs, I just used 7 of C size eggs and it turns out well! Alhamdulillah. 

    Enjoy the recipe and happy baking people!

    Pandan Sponge Cake

    Ingredients
    125g Cake Flour
    1tsp  Baking Powder
    160g Castor Sugar
    5       Large Eggs (A Grade)
    75g   Vegetable Oil (I used corn oil)
    1tsp  Ovalette
    1tsp  Pandan Paste
    2tbs  Fresh / Evaporated Milk
    Methods
    1. Preheat oven at 180˚C.
    2. Sieve together flour and baking power in bowl and put aside.
    3. In a large bowl, mixed together all the ingredients except the flour. Beat the ingredients with electric mixer at high speed until the mixture increased and fluffy.
    4. Put in the flour to the mixture and mixed until the mixture combined.
    5. Greased two of 8-inched spring form baking pan with butter and put in the batter.
    6. Bake for 25-30 minutes.

    Pandan Custard

    Ingredients
    1000ml Instant Coconut Milk
    225g     Castor Sugar
    85g       Hoen Kwee Flour
    125ml   Water
    10g       Instant Agar-agar Powder
    1tbs      Pandan Paste
    1/2tsb   Salt

    Method
    1. Combine together all the ingredients in a pan
    2. Cook the custard at medium heat and stir the mixture until thick.
    3. Pour in the custard mixture in 8-inch spring form baking pan and layered with the sponge cake.
    4. Refrigerate the layered cake in fridge for at least 2 hours. Decorate the cake with desiccated coconut and ready to be served.

    Friday, March 2, 2012

    Recipe: Turkish Delight


    I have been craving for the Turkish Delight like forever. While walking throughout KLCC with my cousin and suddenly I found one at Marks and Spencer! I am so happy and cannot wait to taste it. Ouuuh, it was so sweet, coated with chocolate and with the rose flavoring, I feel like in heaven already! Suddenly after eating the whole packet of Chocolate Turkish Delight, it occurs me whether the gelatine used for making the candy was HALAL or not! Erk, now I'm worried.


     I decided to find the recipe and make it myself. guess what, the ingredient are super easy and it was so easy to make..Wohhoo! This can be considered as lucky!
    I made this!!
     Home Made Candy Recipe - Turkish Delight
    Ingredients
                       Sunflower oil, or other similar natural oil, for greasing
                       30 g powdered gelatine
                       200 ml water
                       3 tsp rose water 
                       400 g caster sugar
                       3-4 drops red food coloring
                       1 tsp cornflour
    Equipments
    20 x 25 cm baking tin
    Large heavy based saucepan
    Bowl
    Instructions
    1. Lightly oil the baking tin.
    2. Mix the rose water, water sugar and gelatin in a large heavy-based pan.
    3. Heat gently until the sugar and gelatin have dissolved, stirring all the time.
    4. Bring to the boil without stirring.
    5. Reduce the heat and simmer for 20-25 minutes.
    6. Remove from the heat, mix in the food coloring and leave the mix to cool for a couple of minutes.
    7. Pour the mix into the oiled tin and leave to set for about 24 hours.
    8. Mix the cornflour and confectioners' sugar in a bowl.
    9. Cut the Turkish Delight into cubes and toss in the bowl containing the cornflour and confectioners' sugar

    ENJOY AND HAPPY COOKING PEOPLE!

    Saturday, December 31, 2011

    Recipe: Chocolate Cake With Strawberry Filling


    Well, I finally did found the Chocolate Cake recipe that is simple and easy to bake. The truth is, the strawberry filling is only as a diversion....hihi to finish it up the strawberry jam on time before it is too late for consuming. Pssst, the chocolate ganache was very tempting rite?


    THE CHOCOLATE CAKE RECIPE
    Ingredients
             200g Dark Chocolate
             200g Butter
             170g Plain Flour
             1/4 tsp Soda Bicarbonate
             1/2 tsp Baking Soda
             200g Brown Sugar
             200g Castor Sugar
             25g Coco Powder
             3 Medium Eggs
             75ml Evaporated Milk
            125ml Water
    Methods
    1. Butter two 8 inch tin and preheat oven at 160 Celsius.
    2. Melt in together chocolate, butter and water by double boiling or in a sauce pan.
    3. In a bowl, shift together flour, baking soda, soda bicarbonate and coco powder.
    4. Beat the eggs in a electrical mixer until fluffy and stir in the evaporated milk.Mix in sugars and pour in the chocolate
    5. Add the flour and mix until corporate. Pour the mixture evenly in the baking tin and bake for 1 hour or until the tooth pick came out clean.


    CHOCOLATE GANACHE RECIPE
    Ingredients
             250ml Eveporated Milk
             250g Dark Chocolate
             3 tbs Castor Sugar
             3 tbs Icing Sugar
             1 tbs Glucose Syrup
             1 tbs Butter

    Methods
    1. Melt the chocolate, sugar, glucose and butter.
    2. After the chocolate mixture has melted, let it cool to the room temperature and put it it the freezer for 15 minutes.
    3. Put in the icing sugar and beat the chocolate until fluffy.

    HAPPY BAKING PEOPLE!

    Monday, November 14, 2011

    Panic Attacked and Became Chocolate Cake!


    What a day and what a panic invention that I have made last weekend...Actually according to plan, I really wanted to bake a nice and silky Tiramisu...but then again it was a disastrous plan that maybe will I "NEVER" baked again for the next 2 months...hihihi 

             So, the story begins with, I already succeed baking my chocolate sponge cake and it was marvelous. The next step is to make the cheese topping...So, I mixed the cream cheese, whip cream and sugar together using the electric mixer...then after a while...Tada~ 

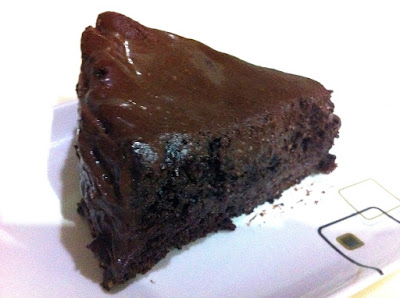
              The cream was not as I expected...not even fluffy and it was sluggish...It look horrible and yuks! This when the panic strikes. I'm thinking that I don't want to waste the creams so I decided to make chocolate ganache just to garnish my chocolate sponge cake...and finally it became OMG! Superb...but honestly i need to practice more to make the chocolate ganache to get the right consistency.

    Looks so tempting~
              Down there you can see how I did it...It was a s simple as ABC actually...but I don't know why I still cannot make a good one...Well, practice makes perfect. Enjoy cooking then people

    CHOCOLATE SPONGE CAKE

    Ingredients
    5 Eggs
    170g Castor sugar
    1tsp Ovalette
    100g All Propose Flour
    1tsp Baking Powder
    40g Cocoa Powder
    70g Canola Oil
    Methods
    1. Preheat oven at 150C
    2. Shift flour, baking powder and cocoa powder together
    3. Beat together eggs, ovalette, canola oil and sugar until the mixture really fluffy
    4. Add in the flour mixture and mix together.
    5. Put in the cake batter in baking tin line with butter.
    6. Bake for 30-40 minutes.
    CHOCOLATE GANACHE  
    (not so perfect recipe)

    Ingredients
    400ml Whipping Cream
    300g Beryl's Dark Chocolate
    200g Cream Cheese
    1tbs Butter
    100g Castor Sugar

    Method
    1. Using double boil technique, melt in the chocolate and butter together.
    2. In a mixing bowl, mix together cream cheese, whip cream and sugar until fluff and add to the chocolate mixture.
    3. Mix until the chocolate corporates with the cream.

    Tuesday, October 25, 2011

    Marshmallow on the loose!


    Yeay! My homemade marshmallow is nicely done...and I'm loving it so much....I got the recipe from Joy of Baking and after this no need to buy it from the market which is not guaranteed to be Halal. Instead of using light corn syrup (which is expensive) I just used the same amount of glucose syrup and it turn out perfectly great! The gelatin I used for the marshmallow is from Halalgel which is a fish base gelatin...Konfirm Halal! The making of this fluffy candy was easy and it only takes about 45 minutes to complete it.

    Enjoy People!!

    It was sticky and hard to cut it~
    Looks so fluffy ain't it!