Monday, July 2, 2012

Pekan Rabu and Ikan Pekasam


Last week I was in Alor Star, Kedah. Of course it a working trip. But I managed to go to Pekan Rabu literally know as Wednesday Market at the heart of Alor Star. It is an old market and has been standing there for 37 years. Older than I am! My main goal is to buy Ikan Pekasam...Yummy! My favorite although it has some ewww fermentation smell. Ikan pekasam is fish fermented with lots of salt, rice and tamarind for few weeks (normally for 2 weeks).

Kak Izan berposing =)
Fermented fish known as "Ikan Pekasam"

Recipe - Ikan Pekasam Goreng


Ingredients: 
  2 Ikan Pekasam
  1 Onion
  3 Dried Chillies
Methods:
  1. Cut onion and dried chilies.
  2. Heat the oil and fried the 'Ikan pekasam' until cooked / crispy.
  3. Sere a little bit the onion and chilies with a spoonful of oil form frying the fish.
  4. Sprinkle the fried onion and chilies over the fried fish. Done =) 

Friday, June 22, 2012

Happy Birthday Kak Yati!


On 22.06.2012, I like to wish Happy Birthday to Nor Haryati Ali a.k.a Kak Ti. May Allah bless you always! Always happy and will be loved by others around you.


          Specially for her, I bake a new cake that I have modified and Alhamdulillah They said it taste great! Not too sweet as for my previous recipes. I am glad that she love the cake.Phew~ I know her favorite color was pink, and I made a Custard Layered Cake with bits of Chocolate Chips. Looks very delicious!

Birthday girl cutting the cake :)
          So, this time I like to share with you guys the recipe. It was simple and surely you can do it too. The important tip for this recipe is to layer the cake white the custard is still hot. Before pouring the custard, grease your 8 inch spring form pan with butter so that the cake will came out easily and will not stick to the pan. To ensure the is no bubble trapped in the custard, you have to press the cake a little bit to the custard. Good luck!

Pink Vanilla Layered Sponge Cake


 Sponge Cake
   Ingredients

     125g Cake Flour
     1tsp Baking Powder
     160g Castor Sugar
     5 Large Eggs (A Grade)
     75g Vegetable Oil (I used corn oil)
     1tsp Ovalette
     1tsp Vanilla Essence
     2tbs Fresh / Evaporated Milk
     Red colorant

   Methods
  1. Preheat oven at 180˚C.
  2. Sieve together flour and baking power in bowl and put aside.
  3. In a large bowl, mixed together all the ingredients except the flour. Beat the ingredients with electric mixer at high speed until the mixture increased and fluffy.
  4. Put in the flour to the mixture and mixed until the mixture combined.
  5. Divide the cake batter into three (~200g) and mix with colorant (you can choose any color you wanted for your cake). 
  6. Greased three of 8-inched spring form baking pan with butter and put in the batter.
  7. Bake for 15 minutes.
Custard
  Ingredients

     800g / 2 cans Evaporated Milk
     250g Castor Sugar
     85g Instant Custard Flour
     250ml Water
    10g Instant Agar-agar Powder
    1tbs Vanilla Essence
    Dessicated Coconut
    Chocolate Chips

Method
  1. Combine together all the ingredients in a pan 
  2. Cook the custard at medium heat and stir the mixture until thick. 
  3. Pour in the custard mixture in 8-inch spring form baking pan and layered with the sponge cake. 
  4. Refrigerate the layered cake in fridge for at least 2 hours (overnight would be better). Decorate the cake with desiccated coconut and ready to be served. 


Friday, June 15, 2012

Poppy Pattern Again!

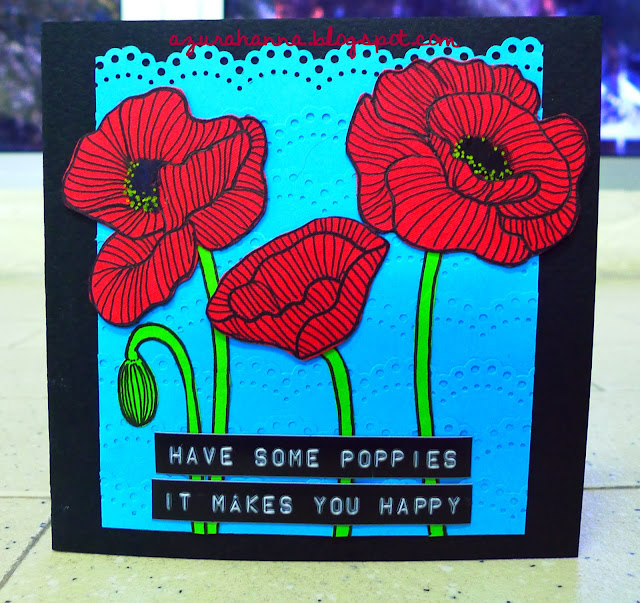
I was mad about poppies and yes, the same pattern too! This It turns out great! Plus pattern embroidery layers of  blue papers looks amazing. It is an experiment because just bought the puncher from Papier Love. Exited to use them for the first time. To my dearest Khairul, thanks for the memorable and sweet adventure! Hope you like this!


Tuesday, June 12, 2012

Have you changed your skin?

He bought a really nice tumbler for me from Starbucks last month (I guess) and the stated on the tumbler "CREATE YOUR OWN TUMBLER" with some instruction on it. So, I decided to create new skin for my tumbler and happily can called it my own. Only takes a day to finished up the work. The interesting part is, you can put my name on it. Means that no one can steal it from me for sure unless he/she will take out the tumbler's skin of course. Attention people, let us make something that we can be PROUD of because we MADE it! 

Before the MAKEUP!
I choose to have red poppies as the theme because really it was one of my favourite flower besides hydrangea, peony and ranunculus. See at the layout, it was easy rite? Bet you can do it too with your own creative designs!  Go go, change your tumbler's skin now!


Yeay! What a cute tumbler!